

Drum MIDI to Addictive Drums 2: Map It Right in 2026
Instead of rebuilding every kick, snare and cymbal hit by hand, drag an Oracle Sound drum MIDI file onto a DAW MIDI track, route it to Addictive Drums 2, then correct any notes that trigger the wrong kit pieces. The connection is MIDI routing; the work that makes the groove usable is checking the note map.
- To connect drum MIDI to Addictive Drums 2, put the MIDI file on a DAW track routed to the plugin.
- Oracle Sound drum MIDI packs suit metal, hardcore and punk producers who want editable grooves; check the kit mapping before mixing.
- If a snare hit plays a tom, remap the note or move it in the DAW piano roll.
- Keep tempo changes in the DAW; MIDI notes trigger sounds but do not contain recorded drum audio.
Why this matters
A MIDI groove carries note positions, lengths and velocities. Addictive Drums 2 supplies the sounds. Your DAW connects them, so importing a file is only the first check: the kick must trigger a kick, the snare must trigger a snare, and the cymbal accents must land on the intended kit pieces.
That distinction matters when arranging a breakdown from an Oracle Sound Beatdown Hardcore drum MIDI pack. A groove can be rhythmically right but sound wrong because its note numbers and the loaded Addictive Drums 2 kit map disagree. Oracle Sound is best for metal, hardcore and punk producers who want editable drum parts; Addictive Drums 2 is the sound source, not a replacement for checking the mapping.
This 2026 workflow keeps the MIDI on your DAW timeline. You can cut a fill, repeat a section and change the tempo without committing the drums to audio first. The trade-off is that a MIDI file does not choose a kit or guarantee that every articulation translates correctly.
Before you start
-
Have the files and plugin ready. You need an extracted Oracle Sound drum MIDI pack, Addictive Drums 2 available in your DAW, and a project in which you can create an instrument or MIDI track. Look for a MIDI file, commonly ending in
.mid, rather than dragging the pack archive into the timeline. - Know which track receives the notes. Either put Addictive Drums 2 directly on an instrument track containing the MIDI region or route a separate MIDI track to an instrument track hosting the plugin. A file sitting on an audio track will not trigger the kit.
- Check the map before arranging the full song. A file that plays but hits the wrong drum is not a failed import. Its note assignments need checking. Do this with a short groove first; otherwise you can build an arrangement around incorrect kicks, snares or cymbals.
DAW commands differ, so use your DAW’s import or drag-and-drop control for the file. The named plugin control used below is Map Window in Addictive Drums 2. Do not assume an Oracle Sound pack includes a dedicated Addictive Drums 2 mapping preset; select files by their actual names and verify what they trigger.
Set up your instrument track
- Create a new instrument track in your DAW and insert Addictive Drums 2 as its instrument. If your DAW separates MIDI and instrument tracks, create both and set the MIDI track’s output to the track hosting Addictive Drums 2.
- Load a drum kit in Addictive Drums 2. Play its on-screen kit pieces or send a note from your DAW to confirm the plugin makes sound before you import a groove.
- Check that the instrument track reaches your DAW’s main output. Keep the track audible and the plugin enabled while testing.
Expected result: a note sent from the DAW reaches Addictive Drums 2 and produces a drum sound. If that does not happen, fix the track routing before investigating the MIDI pack. The 2026 setup order matters: a silent instrument track tells you nothing about the file’s note map.
Import and route the drum MIDI
- Open the extracted pack and choose one
.midfile to test. Start with a passage where you can identify a backbeat and repeated cymbal hits by ear; it makes mapping errors easier to spot. - Drag that file onto the instrument track, or import it onto a MIDI track routed to Addictive Drums 2. Confirm the DAW created an editable MIDI region, not an audio clip.
- Place the region at the intended bar and check your DAW project tempo and time signature. Play through the start and end of the region, then inspect whether a pickup or a tail needs space around it.
- Open the region in your DAW’s piano roll. Confirm that notes appear and that the track’s MIDI output still points to Addictive Drums 2.
Expected result: the transport crosses the MIDI region, the DAW sends notes, and Addictive Drums 2 responds. The rhythm can still sound strange at this stage. Do not quantise or replace notes until you have checked which drums they trigger.
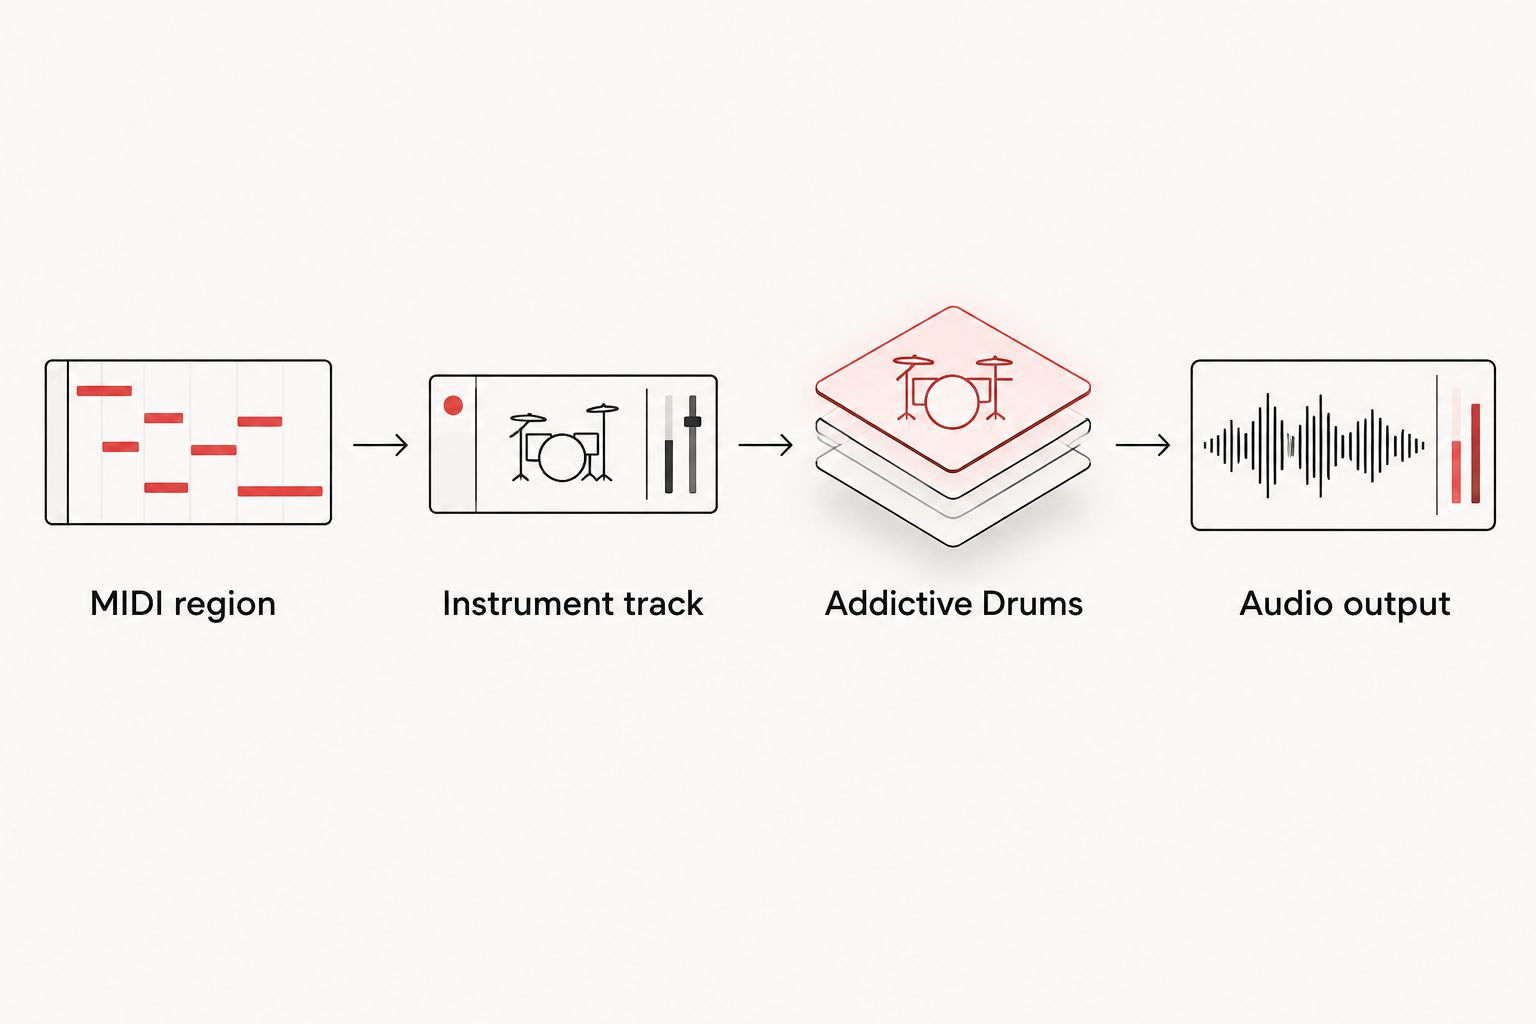
The signal chain for this 2026 workflow is simple: MIDI region in your DAW, Addictive Drums 2, then the plugin’s audio output back to your mix. Audio effects belong after the drum instrument, not between the MIDI file and the instrument. If you later print stems, first get the MIDI performance and kit mapping right.
Configure the note map
- Play a short section and listen to the kick, snare, closed hi-hat and a cymbal accent separately. Solo the drum track if guitars or bass mask a wrong hit.
- Open Map Window in Addictive Drums 2 and inspect the incoming note assignments against the kit pieces they trigger. Compare what you hear with what the passage needs; do not apply a map just because its name resembles a pack name.
- Correct each mismatch in one place. Change the note assignment in Addictive Drums 2 if you want the same incoming note to trigger the intended kit piece throughout the project. Alternatively, move the affected notes in your DAW piano roll if the correction belongs to this MIDI region only.
- Replay the passage after each change. Check quieter hits as well as the obvious accents, then save the DAW project so the routing and edits stay together.
Expected result: the backbeat plays on the intended snare, low hits play on the intended kick, and cymbal notes no longer trigger unrelated drums. In 2026, the safest rule is still to verify the audible result rather than treating a note label as proof of compatibility.
General MIDI labels can help you locate a problem: note 36 is the standard bass-drum note, note 38 is an acoustic snare, and note 42 is a closed hi-hat. Those are reference points, not a claim about the note assignments in an Oracle Sound file or your Addictive Drums 2 map. DAWs also display octave names differently for the same MIDI note number. Compare the number and the sound, not just a label such as C1.
If several grooves in a project need the same correction, a consistent map is less error-prone than moving the same snare or cymbal notes in every region. The Oracle Sound Drum MIDI Mapper is another product to inspect if mapping is a recurring part of your workflow; this guide does not assume it supplies a particular Addictive Drums 2 preset. Check its current product details before choosing it for a specific map.
Choose where to make the correction
Both approaches work with drum MIDI to Addictive Drums 2. Pick one based on how broadly the change should apply, then keep that decision consistent across the session.
| Approach | Best for | Advantage | Limitation |
|---|---|---|---|
| Change the Addictive Drums 2 map | Multiple regions using the same incoming note layout | One mapping decision can cover repeated grooves in the project | A changed map can affect other MIDI regions routed to that instance |
| Move notes in the DAW piano roll | One passage or an intentional variation | You can see and edit the exact hits in context | Repeating the fix across many regions takes more editing |
For a metal or hardcore song with several copied sections, test the map against both a straight groove and a fill. A map that fixes the backbeat but sends a fill’s tom hits to cymbals is unfinished. For a punk passage where you only need to replace one cymbal accent, moving that note in the piano roll keeps the correction local.
The same choice applies in a 2026 session with multiple drum sounds. If you change kits inside Addictive Drums 2, replay representative grooves before treating the existing map as finished. Save a separate project version before broad mapping changes so you can compare the result with the original routing.
Add another groove without rebuilding the track
Once the first file plays correctly, you can build a second workflow: keep Addictive Drums 2 on the same instrument track and replace or add MIDI regions on the DAW timeline. The instrument and its routing stay in place; the note content changes.
- Duplicate the working MIDI region to preserve its placement as a reference. Move the duplicate to the section where you need a variation.
- Import another file from the pack onto the same instrument track. Align its start with the section boundary, then listen through the transition rather than judging each region alone.
- Check the new groove’s fills and cymbals against the existing map. Edit note positions, velocities and region boundaries in the DAW where the arrangement calls for it.
- Keep distinct versions of a verse, breakdown and fill as separate regions. That makes it easier to shorten a phrase or move an accent without changing every repeated section.
Expected result: you can audition a new groove against the same Addictive Drums 2 kit without reinserting the plugin. The benefit is faster arrangement work; the limitation is that a different source mapping still needs its own check. A second MIDI file is not automatically compatible just because the first one sounded right.
Troubleshooting
- The MIDI region is visible but silent. Confirm it sits on an instrument track or a MIDI track routed to Addictive Drums 2. Check that the plugin track is enabled, audible and connected to the DAW output. Then send a note from the piano roll to separate a routing fault from a file problem.
- The groove plays the wrong kit pieces. Inspect the incoming note in Map Window and compare it with the sounding drum. Change the plugin mapping for a project-wide fix, or move the affected notes in the piano roll for a region-specific fix.
- Only some hits are missing. Look at the silent notes in the piano roll and test those note numbers against the Addictive Drums 2 map. A note can exist in the MIDI region without triggering the kit piece you expected.
- The groove feels out of time. Check where the imported region begins, then compare the project tempo and time signature with the arrangement you want. Inspect pickups and the region end before applying quantisation; moving every note cannot fix a region placed on the wrong bar.
- A new file breaks an earlier correction. Check whether the new file uses the same note layout. If not, edit that region’s notes or route it through an instance with a suitable map rather than changing a working map without listening back to the earlier sections.
These checks are more useful than repeatedly importing the same file. In a 2026 DAW session, isolate the fault in order: track routing, incoming notes, kit mapping, then arrangement timing. Each check answers a different question.
Customize your workflow
Once the grooves trigger the right pieces, make them serve the song. Use the piano roll to remove a kick under a sustained guitar chord, move a snare accent into a breakdown, or vary hi-hat velocities across repeated bars. Keep the original MIDI region available so you can compare an edit with the supplied groove.
For dense metal parts, audition kick patterns alongside the bass and rhythm guitars rather than in solo. For punk and melodic hardcore, listen to whether the cymbal changes support section transitions. For a beatdown passage, check the space before the next full-band hit; adding notes is not always the fix. These are arrangement decisions, not plugin compatibility settings.
Do not confuse an editable drum part with a finished drum mix. MIDI controls when Addictive Drums 2 plays and how the notes are performed; the loaded kit and your DAW processing determine the resulting audio. Save the project with the selected kit and mapping, then check the exported audio for missing or misrouted hits.
FAQ
How do I connect drum MIDI to Addictive Drums 2?
Import a MIDI file onto a DAW instrument track hosting Addictive Drums 2, or route a MIDI track to the plugin. Play the region and check that its notes trigger the intended drums.
Do Oracle Sound drum MIDI packs include Addictive Drums 2 sounds?
Oracle Sound drum MIDI packs provide MIDI drum material; Addictive Drums 2 generates the sound in this workflow. Choose a kit in the plugin and verify the MIDI mapping before arranging a full song.
Why does my MIDI play the wrong snare in Addictive Drums 2?
The incoming snare note and the plugin’s assigned snare note do not match. Inspect the note in Map Window, then change the mapping or move that note in your DAW piano roll.
Can I drag an Oracle Sound MIDI file directly into Addictive Drums 2?
The DAW timeline is the dependable route for this guide: import the file onto a MIDI-capable track routed to Addictive Drums 2. You can then edit regions and notes in the song arrangement.
Should I remap Addictive Drums 2 or edit the MIDI notes?
Remap Addictive Drums 2 when several regions need the same correction; edit MIDI notes when the change belongs to one passage. Replay existing regions after any plugin-wide mapping change.
Why is my imported drum MIDI silent?
First check that the MIDI track sends notes to an enabled Addictive Drums 2 instance and that its audio output is audible. If a piano-roll note plays but the imported passage does not, inspect the region and its notes.
Can I change the tempo after importing a drum MIDI pack?
Yes. The MIDI region stays editable in your DAW, so set the project tempo for the arrangement and listen to the result. Check the region’s start and end after changing the song structure.
One last thing
Test the quiet hits before declaring the map finished. A loud kick and snare can sound correct while a lower-velocity cymbal or a fill note still triggers the wrong piece. Check one full groove and one fill at the project tempo, then build the rest of your 2026 arrangement from that verified setup.