

How long does it take to program a drum MIDI track?
Programming a drum MIDI track has no fixed completion time: the work depends on whether you need a riff-writing loop, a full-song arrangement or release-ready drums. Importing a suitable groove removes the need to enter its notes from scratch, but you still need to check mapping, edit the arrangement and match the drums to your guitars. Define the finish line before you start programming.
- How long does it take to program drum MIDI? Separate groove creation, arrangement and final drum production.
- Oracle Sound drum MIDI packs suit heavy producers who want existing patterns to edit rather than enter from scratch.
- Check drum mapping before editing; correct timing cannot fix notes triggering the wrong kit pieces.
- Finish kick, snare and section changes before polishing cymbals, fills and drum sounds.
Why this matters
A drum part that lets you write a breakdown is not the same deliverable as a finished drum arrangement. Treating them as the same job sends you into velocity editing while the guitar structure is still changing.
For a metal or hardcore session in 2026, start with the production problem: does the riff need a straight backbeat, a half-time feel or kicks that follow its accents? Oracle Sound's MODERN METAL/HARDCORE 10 SONG DRUM MIDI PACK provides existing drum MIDI material for that genre. You still make the arrangement decisions.
How long does it take to program a drum MIDI track?
The useful distinction is creating the notes versus finishing the performance. Starting with existing MIDI changes the first task; it does not remove the second. A completed track needs the right notes, the right section lengths and a drum instrument that plays the intended articulations.
Choose your starting method according to the work you actually need to do:
| Starting method | Best for | Work it removes | Work it leaves |
|---|---|---|---|
| Program from scratch | A specific rhythm you already hear | No existing pattern to adapt | Note entry, accents, fills and arrangement |
| Edit an existing groove | Writing around an established feel | Entering the starting pattern | Mapping checks and changes to fit the riff |
| Combine existing grooves with custom edits | Songs with familiar sections and distinctive transitions | Rebuilding every section from an empty piano roll | Consistency checks, joins and custom accents |
Programming from scratch gives you direct control over every hit, but you must make every rhythmic decision. Existing grooves give you a populated starting point, but an unsuitable groove creates editing work of its own. Combining both methods keeps reusable patterns where they fit and custom programming where the riff demands it.
Before you start, write a short completion checklist. For a demo, that might mean every section has a playable groove and the drums follow the guitar stops. For a release, it also includes intentional velocities, articulations, transitions and a checked audio render.
A songwriting draft: finish the structure first
A songwriting draft is finished when the drums support decisions about the song. You need to hear where the riff lands, where the energy changes and whether the transition works. You do not need to resolve every ghost note before recording a guide guitar.
Build the kick and snare around the riff's important accents. Add a cymbal pattern that makes the pulse obvious, then extend the groove across the section. Keep the initial pattern readable; complicated fills make it harder to judge whether the underlying part works.
For a 4-beat bar in 4/4, a straight backbeat example places the snare on beats 2 and 4. A half-time example places the main snare on beat 3. These are starting patterns, not rules for every punk or hardcore riff.
Use a clear stop condition for your 2026 songwriting sessions: the drums must support the structure you are recording now. Save detailed performance editing until the arrangement stops changing. Otherwise, a rewritten chorus discards work you did not need yet.
A release arrangement: finish the performance, then the sound
Release-ready drums require more than a repeated pattern. Check how the kick supports the bass, whether snare accents stay consistent and whether cymbal changes make the sections distinct. Listen across transitions, not just inside individual loops.
Separate MIDI decisions from sound decisions. A wrong kick placement needs a note edit; an overly long kick tail needs attention in the drum instrument or mix. Changing drum samples will not repair an awkward fill landing.
MIDI note-on velocity uses values from 1 to 127 for sounding notes; velocity 0 functions as note-off. Those values are performance instructions, not guaranteed loudness measurements. The audible result depends on how the receiving instrument responds to velocity.
Keep strong accents deliberate and softer hits subordinate. Do not randomise everything and call it humanisation. A blast beat, a punk backbeat and a half-time breakdown need different accent relationships, even when they use the same kit.
Why drum MIDI programming time varies
The amount of work changes with the musical brief and the starting material. These are the decisions to settle before judging how much programming a track needs:
- Starting pattern: An empty piano roll requires note entry; an existing groove requires selection and adaptation.
- Arrangement scope: A repeated riff and a complete song with stops, fills and contrasting sections are different jobs.
- Genre fit: A groove selected for punk does not automatically supply the feel you want for a beatdown section.
- Drum mapping: Imported notes must trigger the intended kick, snare, toms and cymbal articulations.
- Finish standard: A writing draft needs a usable structure; a final arrangement also needs performance and playback checks.
Do not combine these decisions into a vague request to make the drums sound better. Identify the unfinished task. If the structure works but the cymbals trigger incorrectly, fix the mapping rather than rewriting the groove.
A practical DAW workflow for finishing the track
Use this sequence for your 2026 sessions to keep arrangement work separate from troubleshooting. Each step has a clear output, so you know when to move on.
1. Set the arrangement
Place markers for the sections you already know: intro, verse, chorus, breakdown and ending. Set the tempo and time signature before extending MIDI across the song. If the riff changes metre, represent that change in the session rather than forcing every section into the same bar length.
Record or import a guide guitar. Its job is to make the rhythmic target audible, not to establish the final guitar tone. Programme against the riff instead of guessing how the drums will fit later.
2. Check mapping
Load your drum instrument and send the MIDI track to it. Audition kick, snare, tom and cymbal notes separately, then check articulation-specific notes such as closed hats and open hats.
Do this before moving individual hits. A groove that plays the wrong kit pieces is not evidence that its rhythm is unsuitable. Confirm the note assignments first, then judge the musical result.
3. Build the backbone
Work on kick and snare before fills. Match the important guitar accents, but do not automatically duplicate every palm-muted note with a kick. Listen for whether the drums reinforce the riff or crowd it.
For a breakdown, test the main snare placement against the guitar phrase. For a punk section, establish the backbeat before adding extra snare hits. Keep the core groove understandable when you mute the cymbals.
4. Arrange the transitions
Extend each groove to the section boundary, then edit the join into the next section. Check the final fill note and the next downbeat together. A fill needs to lead somewhere, not simply occupy the end of a clip.
Make guitar stops explicit in the MIDI. Check whether a cymbal should sustain through the gap or stop with the band; those produce different arrangements. Remove accidental duplicate hits where clips overlap.
5. Shape the performance
Adjust accents and supporting hits intentionally. Keep repeated snare accents consistent unless the phrase calls for a change, and check that quieter notes remain audible with the selected drum instrument.
For timing, start with the rhythmic structure intact. Change placement only when you can hear a musical reason. Tight riff accents and looser supporting notes can coexist; blanket randomisation does not make that decision for you.
6. Review the render
Listen to the drum instrument with the guitars and bass, then export a reference. Check the first hit, section changes, intentional silences and the ending. Confirm that the rendered audio matches the playback you approved.
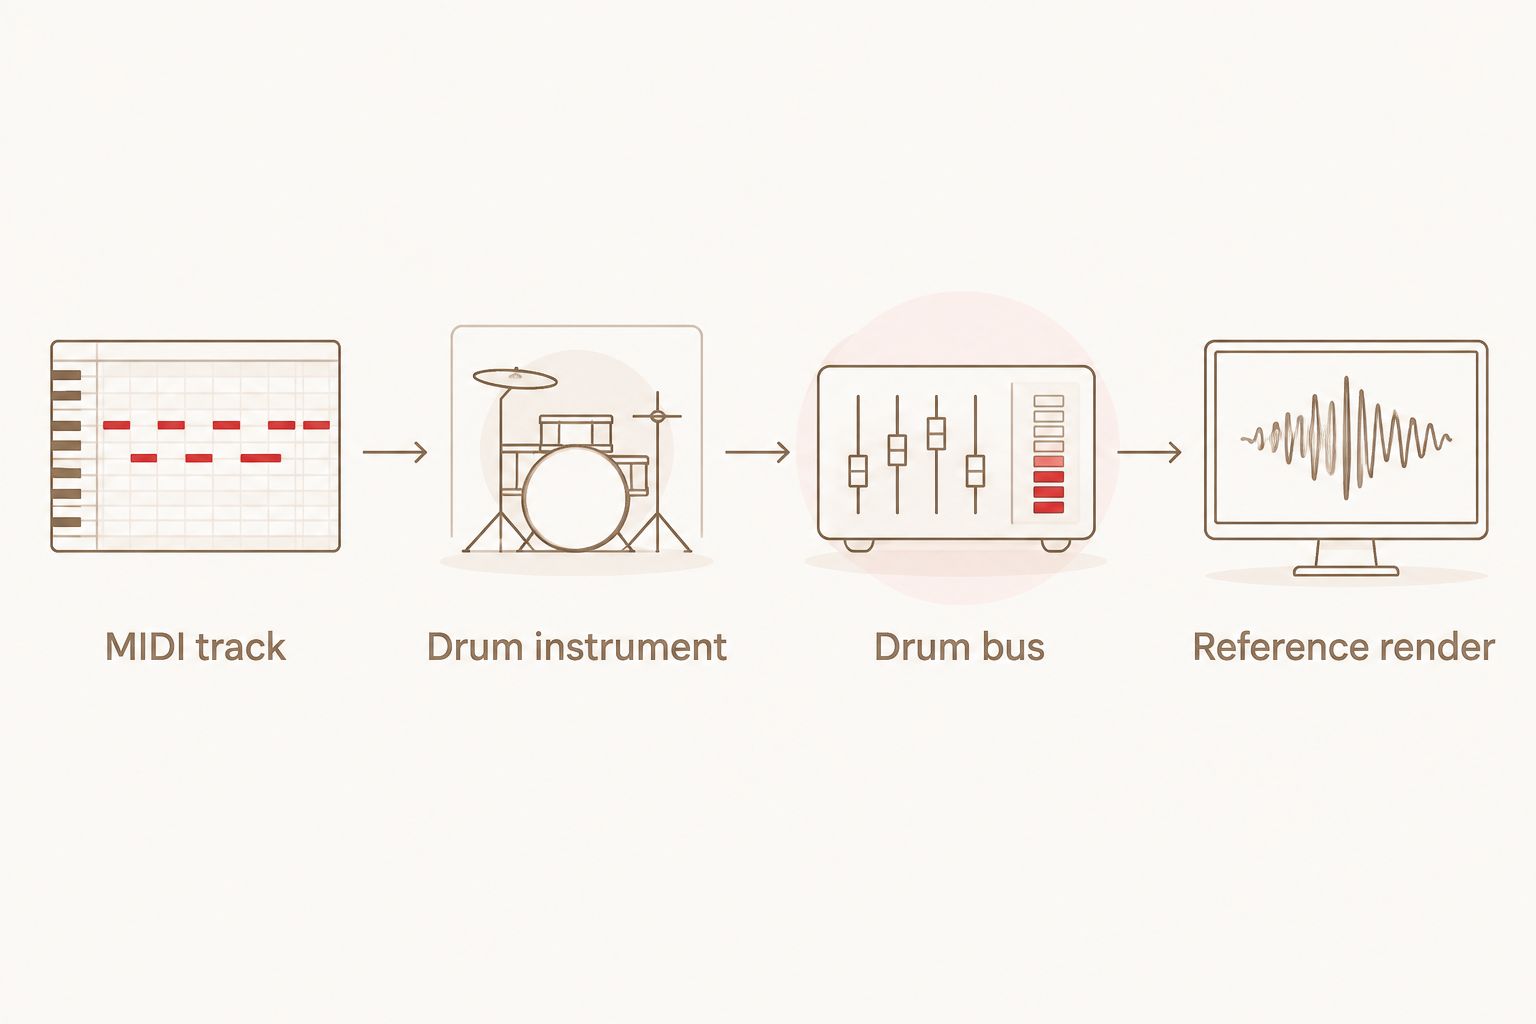
The signal chain is MIDI track, drum instrument, drum bus, reference render. MIDI supplies performance instructions; the drum instrument supplies sound. Keep those roles separate when diagnosing a problem.
Choose a groove library that matches the riff
Oracle Sound drum MIDI packs are best for heavy producers who want existing patterns to edit rather than enter from scratch. The trade-off is that you must adapt those patterns to your song. A library supplies material, not an approved arrangement.
The catalogue distinguishes genre-focused packs. Choose according to the section you are writing rather than assuming every heavy groove is interchangeable.
| Drum MIDI pack | Best for | Useful starting point | Limitation |
|---|---|---|---|
| MODERN METAL/HARDCORE 10 SONG DRUM MIDI PACK | Modern metal and hardcore songwriting | A 10-song pack described for modern metal and hardcore | The genre label does not guarantee a match to your riff |
| BEATDOWN/HARDCORE 10 SONG DRUM MIDI PACK | Beatdown hardcore songwriting | A 10-song pack described for beatdown hardcore | You still need to check mapping, section lengths and accents |
Choose MODERN METAL/HARDCORE when that is the musical brief. Choose BEATDOWN/HARDCORE for a beatdown-focused starting point. Neither pack establishes a fixed completion time, and neither replaces the drum instrument that turns MIDI notes into audio.


Is editing a drum MIDI groove faster than starting from scratch?
Editing a suitable groove removes the task of entering its existing notes. It still leaves selection, adaptation and playback checks. If you need to replace the core rhythm, programming that section directly gives you a clearer starting point than fighting the imported pattern.
Does humanising drum MIDI make it release-ready?
Humanisation alone does not make drum MIDI release-ready. Correct notes, articulations and arrangement come first; velocity and timing edits then serve that performance. Judge the result with the full band, not by how irregular the piano roll looks.
Should you finish the drum sound before writing the song?
You need a usable drum sound to judge the groove, not a finished mix. Establish enough kick, snare and cymbal definition to hear the arrangement. Delay detailed processing until the performance and structure are settled.
FAQ
How long does it take to program drum MIDI in 2026?
There is no fixed completion time for programming drum MIDI. A riff-writing loop, a full-song arrangement and release-ready drums require different amounts of note entry, editing and checking.
What's the quickest way to get drums under a hardcore riff?
Start with a suitable existing groove, check its mapping and edit the kick and snare against the riff. Finish the section structure before polishing fills and cymbal details.
Do Oracle Sound drum MIDI packs produce audio by themselves?
Drum MIDI needs a receiving drum instrument to produce audio. Oracle Sound sells MIDI drum tracks and groove libraries; the MIDI supplies note and performance instructions.
Why does imported drum MIDI play the wrong sounds?
The MIDI notes and the receiving instrument's drum mapping are not aligned. Check note assignments and articulations before changing the rhythm.
Should every kick follow a guitar chug?
Every kick does not need to follow every guitar chug. Match the accents that define the riff, then listen for whether additional kicks support or crowd the part.
Can I use the same groove for every chorus?
You can repeat a groove when the choruses need the same feel. Check each entry, exit and fill separately so the repeated pattern fits its place in the song.
One last thing
For your next 2026 session, test the drums without the guitar before calling the arrangement finished. The groove should retain a clear pulse, intentional accents and convincing section changes. Then restore the guitars and check the stops together.
Delete unnecessary hits before adding more detail. A fill that clashes with the next riff needs a better landing, not necessarily more notes.